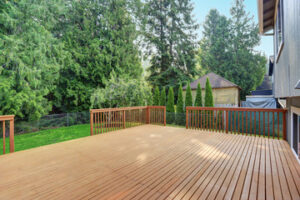
If a deck is sagging, uneven or has rot damage, it’s likely time for full replacement. A new deck will cost more than repairing the old one, but it’s a good investment that adds value to your home.
Start by examining framing members. Look for the familiar green tint of treated lumber. Visit https://www.deckbuilderstafford.com/ to learn more.
The deck’s framing is often the first area that needs repair, and a major reason why many homeowners consider a deck replacement. Framing issues can range from sagging joists to safety hazards like exposed nails and loose boards. If the deck isn’t safe to walk on, it’s best to hire a professional to inspect and estimate repairs or a replacement.
A professional can also help you decide how to layout your new deck, based on your intended use. You can then create a plan for furniture placement and other features. The plan can also include stairs that provide access to the yard or driveway, or lead down to a pool or patio.
To begin your project, you’ll need a good supply of lumber for the deck’s frame. A jig to help you set the posts can save you time and trouble, as can using a post hole calculator to determine the number of bags of concrete mix you’ll need for your project. You can find these tools and more at a home improvement store or building center.
You’ll also need a ledger board, which determines the height of the rest of the deck. Choose a 2×8 (51 x 203 mm) that’s straight and not twisted or cupped. Run a string line from one end of the ledger to the other to make sure it’s level, then mark and cut it. Attach it to the existing deck’s joists with a pair of deck brackets, using screws to ensure a tight fit.
After you’ve installed the ledger, you can install the remaining typical joists. This is when it’s a good idea to have the professional you’re working with measure and lay out each joist, including any cuts or angles that will be needed. To avoid wasting material, always calculate for board spacing before purchasing your materials. This means adding 0.125 inches to the length of each joist for proper support and a smooth surface. The fore and aft carlins you install will also be important, as these are what establish the edges of the deck.
Boards
A deck needs to be inspected periodically for signs of damage, and it’s important to decide whether the structure can be repaired or if a complete replacement is necessary. If the damage is limited to a few boards, patching may be sufficient. However, if the deck has significant structural issues or the damage extends to the joists beneath the surface boards, it’s best to start fresh with a new deck.
When replacing a board, make sure you’re using the same type of wood as what was originally used. Different species have unique characteristics that can affect how the wood performs and how it looks on your deck. If you aren’t sure what type of lumber was used originally, take a small cut and smell it. Pressure-treated wood, redwood, and cedar all have distinctive aromas.
Begin by carefully removing the damaged board from the deck using a pry bar or other tool that can lift the board without damaging the neighboring boards. If the board is nailed down, use a hammer to extract the nails. If you need to remove screws, you can use a drill or screwdriver with an appropriate bit. Place a block of wood under the board to avoid marring adjacent deck boards when using a pry bar.
After removing the damaged deck board, inspect the joists for signs of damage and remove any rotten sections. If a joist is compromised, you’ll need to reinforce it with cleats or sister joists. Install the joist reinforcements with framing nails or structural screws at the existing joist where you cut off the deck board and anywhere else that a joist might need additional support.
Measure the length of the replacement deck board and mark it with a speed square and a pencil where you’ll be cutting. Carefully cut the deck board with a jigsaw, making sure that you don’t cut into the joist below. Be sure to stagger the seams of the new board for a more professional look and added structural integrity. Once the deck board is in place, you can reinstall any fasteners that were removed and apply a sealer or stain.
Railings
If your deck’s railing is outdated or damaged, replacing it can make your whole deck feel new. It can also provide an opportunity to upgrade the look and add functional features such as drink rails or cable infills.
Wood railings are traditional and come in a wide variety of styles. They can be made from cedar, redwood or pressure treated lumber. Some of these materials are more expensive than others, but they will all last for decades with regular care. Wood railings are susceptible to rot and insect damage, so they require periodic staining or painting to stay looking good.
Composite and PVC railings are low-maintenance options that can mimic the look of wood without the need for staining or painting. These materials are resistant to rot and insect damage, but they will not stand up to the elements as well as solid wood. They are available in a wide variety of colors and can be finished to match the rest of the deck.
Metal railings are another low-maintenance option that resists rot, corrosion and insect damage. They can be made from aluminum, steel or galvanized steel. They are often painted or powder coated to resist the weather. They may be framed or frameless, depending on the style you prefer.
Glass railings are a more modern and sleek option that allows for unobstructed views. They are typically framed or frameless and can be made from tempered safety glass.
Once you’ve selected a new railing style, the installation process is relatively straightforward. Measure the distance between posts to ensure that your new railing is properly spaced. If you’re using a solid or semi-solid material, cut and nail the pieces together. If you’re using a hollow or lattice style, the top and bottom pieces are pre-welded for fast, easy assembly. Some systems, like Fortress FE26 Steel railing, take it one step further and offer pre-bracketed panels with the brackets attached at the correct spots. This can save a lot of time.
Finishing
Once you’ve gotten the deck framing in good shape, it’s time to start the fun part — adding the boards. The tear-off should be relatively easy, and you can use a hammer or a sledge to remove most of the old decking without damaging the structural members. Before removing the old decking, however, it’s worth taking the time to inspect the entire structure below the surface boards for signs of rot or other damage.
You should also make sure that the joists are straight and in good condition. One way to check is by using a string to measure the distance between the joists. If the joists aren’t straight, you can either shim them or replace them. If a joist is rotten, it’s best to replace it altogether, as rot can spread quickly in exposed wood.
While you’re examining the joists, look for any areas where they’ve been damaged by water or insects. This is a common cause of rot, and it can lead to collapse. If you see rot, remove the affected section and treat the remaining wood to prevent future problems.
Another important step in preparing the deck for new board installation is to apply a coat of protective stain or paint. Stain is a great choice for decks in wet climates, as it helps protect the wood from moisture damage and UV rays. It’s also a good idea to choose a stain that is weather-resistant, so it can stand up well to the elements.
During the installation of the new deck boards, be sure to leave sufficient space between them for water drainage and expansion. You should also stagger the joints in the deck boards to create a more natural appearance. Also, be sure to measure the length of each board to ensure that it’s the right size before cutting it.
Lastly, don’t forget to apply a coat of sealant to the top of the boards to help them resist UV damage and moisture. This will help extend the life of the new deck boards and keep them looking new longer.